Two years ago, I walked onto a set that every gaffer has nightmares about.
It was a documentary shoot for a high-end watchmaker in Chicago. The producer had promised me a “spacious, industrial workshop” with plenty of power for my standard lighting package. I arrived with my van loaded with heavy C-stands, 1200d heavy-hitters, and thick stingers (extension cables).
But when I walked in, the reality hit me.
The “workshop” was actually a tiny, cramped attic in a historic building. It was barely 10×12 feet. Worse, the building manager stopped me at the door: “No heavy equipment on the hardwood floors, and absolutely no plugging into the wall outlets. The wiring is from the 1920s; you’ll blow a fuse instantly.”
The sun was setting. The talent was arriving in 15 minutes. And my entire van of gear was useless.
I had to leave the big lights behind. I grabbed a small backpack where I kept a “backup kit”—two small battery-powered COB lights and a tube light I had just bought for testing.
I walked up four flights of stairs with nothing but that backpack and two lightweight stands. I set up in 10 minutes. When we rolled camera, the image on the monitor wasn’t just “passable”—it was gorgeous. The client was thrilled, and the watchmaker looked like he was in a Ridley Scott movie.
That day changed my philosophy forever.
I realized that portable studio lighting isn’t just a “backup plan” anymore. With the right gear, it is a legitimate replacement for the heavy iron we used to haul.
If you are a solo creator, a traveling videographer, or a YouTuber working in a small apartment, this guide is for you. Let’s talk about how to build a “Backpack Studio” that delivers Hollywood results without the back pain.
[INSERT IMAGE HERE]
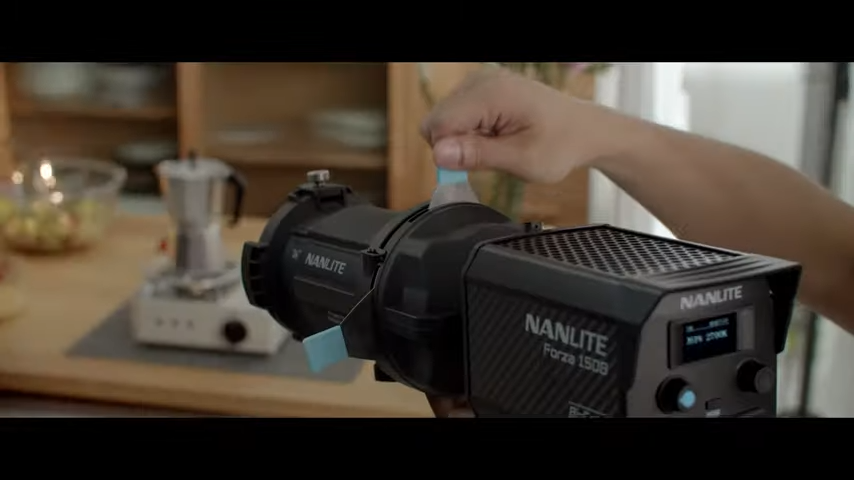
Suggested Caption: A minimalist lighting setup in a tight space using battery-powered COBs.
The New Standard: Why “Portable” No Longer Means “Weak”
In the old days of film school, “portable lighting” meant dim, flickering LED panels with terrible color accuracy. They made skin tones look green and shadows look muddy. If you wanted quality, you needed tungsten or HMI lights, and those needed heavy generators.
But in 2026, the game has changed completely.
Technological advancements in Chip-on-Board (COB) LEDs have given us lights that are:
- Output Monsters: Small 60W or 80W lights can now rival the output of old 500W tungsten fixtures.
- Battery Efficient: You can run a key light for over an hour on standard NP-F or V-mount batteries.
- Color Accurate: High CRI (Color Rendering Index) and TLCI scores mean skin tones look natural right out of the camera.
Portable studio lighting is no longer about compromise. It’s about efficiency.
Anatomy of a “Backpack Studio”: What to Look For
Before you buy random gear, you need to understand the three pillars of a professional portable setup. As a gaffer, these are the non-negotiables I look for when building a travel kit.
1. Power Independence (The V-Mount Revolution)
A true portable light must run on batteries. Period.
If you have to hunt for a wall outlet, you are tethered. You lose the ability to shoot in a forest, an abandoned warehouse, or a historic attic.
- The Standard: Look for lights that accept V-Mount batteries (the industry standard) or NP-F batteries (cheaper, but less power).
- Lucas’s Tip: Always buy lights that have the battery plate integrated or included. Dangling power bricks are a nightmare on a windy day.
2. The Bowens Mount (Don’t Buy “Toys”)
This is the biggest mistake beginners make. They buy small “pocket lights” that look like smartphones.
The problem? You can’t shape that light.
A hard light source looks amateurish on a human face. To get that soft, cinematic look, you need a softbox.
- The Rule: Your portable key light must have a Bowens Mount. This universal mount allows you to attach professional softboxes, snoots, and lanterns. It turns a flashlight into a studio light.
3. Bi-Color Versatility
When you are “running and gunning,” you can’t control the environment.
- If you are shooting near a window, you need 5600K (Daylight) to match the sun.
- If you are shooting in a dim restaurant, you need 3200K (Tungsten) to match the practical lamps.
A portable light that is fixed at one color temperature will fight you. Always go for Bi-Color fixtures for your travel kit.
The Gear Breakdown: What Actually Goes in the Bag?
So, what exactly should you buy? Here is the breakdown of the lighting tools that utilize these technologies.
1. The Pocket COB (Your Key Light)
This is the heart of your portable studio. It needs to be punchy enough to serve as your main source of illumination. Currently, the “sweet spot” for portability vs. power is the 60W to 80W range.
My Recommendation: I’ve been testing the GVM SD80 extensively recently, and it’s a prime example of this category.
It’s barely larger than a soda can, fits in a camera bag lens slot, but when you put a mini-dome on it, it delivers beautiful, soft light. It has the crucial Bowens mount adapter and runs seamlessly on batteries. For a solo shooter, this is often all you need.
2. The Tube Light (Your Rim/Fill)
Tube lights are the Swiss Army knives of portable lighting.
- Need a hair light? Duct tape it to the ceiling.
- Need a background practical? Put it in the shot.
- Need a fill? Hold it in your hand.
Because they are long and thin, they slide into the side pockets of a backpack easily.
3. The Modifier (Quick-Release is King)
You cannot bring a standard studio softbox with 16 steel rods. It takes 10 minutes to assemble.
You need Quick-Release Softboxes (often called “Lanterns” or “Para Snap” designs). They pop open like an umbrella in 3 seconds. Time is money, especially when you are losing daylight.
The “Run & Gun” 3-Point Setup
Here is a specific recipe. If you buy this kit, you can light a professional interview literally anywhere on Earth.
[INSERT DIAGRAM HERE]
Suggested Caption: The Classic 3-Point Lighting Setup using portable gear.
- Key Light: A portable COB (like the GVM SD80) + a 22-inch Quick-Release Softbox.
Placement: 45 degrees to the subject, slightly above eye level. This creates the “Rembrandt” triangle on the cheek. - Fill Light: A collapsible 5-in-1 Reflector.
Why? You don’t need a second light. Just bounce the spill from your Key Light back onto the shadow side of the face. It’s lighter and cheaper than another fixture. - Back Light (Rim): A small RGB Tube Light or a mini LED panel.
Placement: Behind the subject, opposite the key light. Set it to a cool blue (Teal) color to separate the subject from the warm background.
Total Weight: Less than 15 lbs.
Setup Time: 5 minutes.
Result: Netflix-quality image depth.
Common Mistakes When Going Portable
Even with the best gear, I see creators making rookie mistakes when they leave the studio.
1. Underestimating the Wind
Carbon fiber travel stands are amazing because they weigh nothing. But that means the wind loves them. I once saw a $600 light smash into concrete because a gust of wind caught the softbox.
The Fix: If you are outside, hang your backpack on the center column of the light stand. It acts as a sandbag.
2. Trusting the Battery Meter
On cold days, batteries drain faster. If the screen says “30 Minutes Remaining,” treat it like “15 Minutes.” Always, always bring one more battery than you think you need.
3. Ignoring Noise
Small lights have small fans to keep them cool. Some cheap brands sound like a jet engine taking off, which ruins your audio. Always check reviews for “fan noise” (another reason I lean towards newer models like the GVM Pro series which have silent modes).
Final Thoughts: The World Is Your Studio
That day in the Chicago attic taught me a valuable lesson: Limitations force creativity, but good gear removes the friction.
Portable studio lighting gives you the freedom to say “Yes” to shoots that others refuse. It allows you to turn a garage, a rooftop, or a hotel room into a cinematic set in minutes.
You don’t need a van full of tungsten anymore. You just need to understand light, and pack the right tools.
If you are looking to start your portable kit, I highly recommend starting with a versatile COB light like the GVM SD80. It’s the piece of gear I wish I had twenty years ago.
Now, pack your bag and go create something amazing.
Next Steps:
- Read More: What is a COB LED Light? (And Why You Need One)
- Gear Check: GVM SD80 Review: The Ultimate Travel Light?