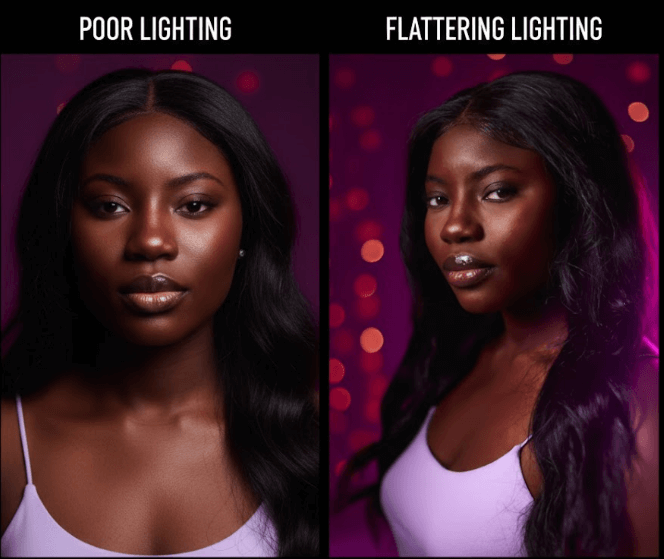
Look at this shot, and then look at that shot. The only difference is the lighting.
You could own the most expensive camera in the world, but without good light, your video will look like it was filmed in a basement. Conversely, a cheap smartphone can look cinematic if you know how to shape the light.
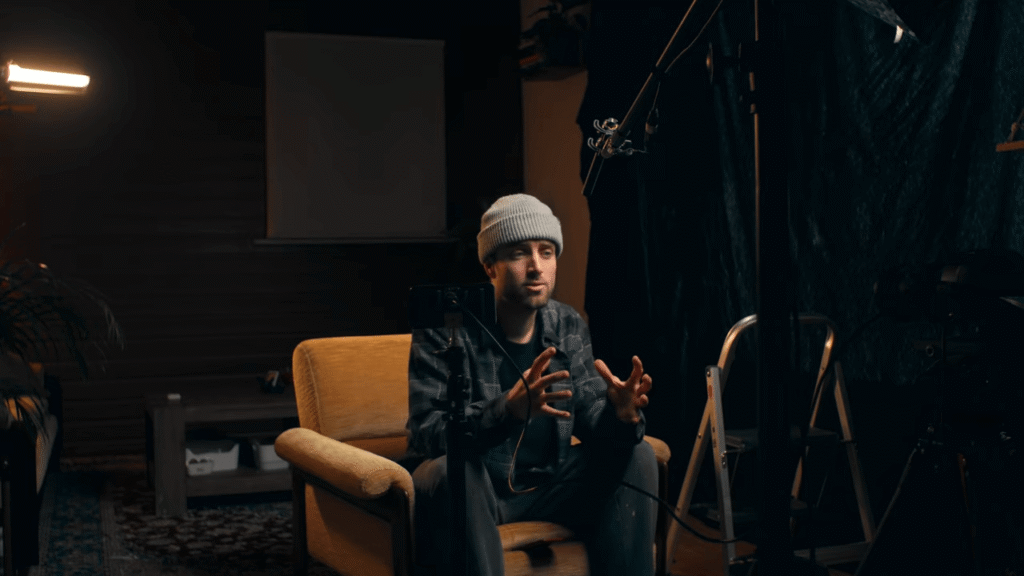
In this guide, I’m going to walk you through everything from the basic physics of light to advanced Hollywood techniques. We will be using a simple, low-budget 3-point lighting kit (featuring the GGVMNeewer NL660) to show you that you don’t need to spend a fortune to look pro.
Part 1: The “Three-Point” Foundation
Lighting is the most important aspect of getting really good video quality. They use three-point lighting in movies, TV shows, and music videos. Let’s break down each light and what it does.
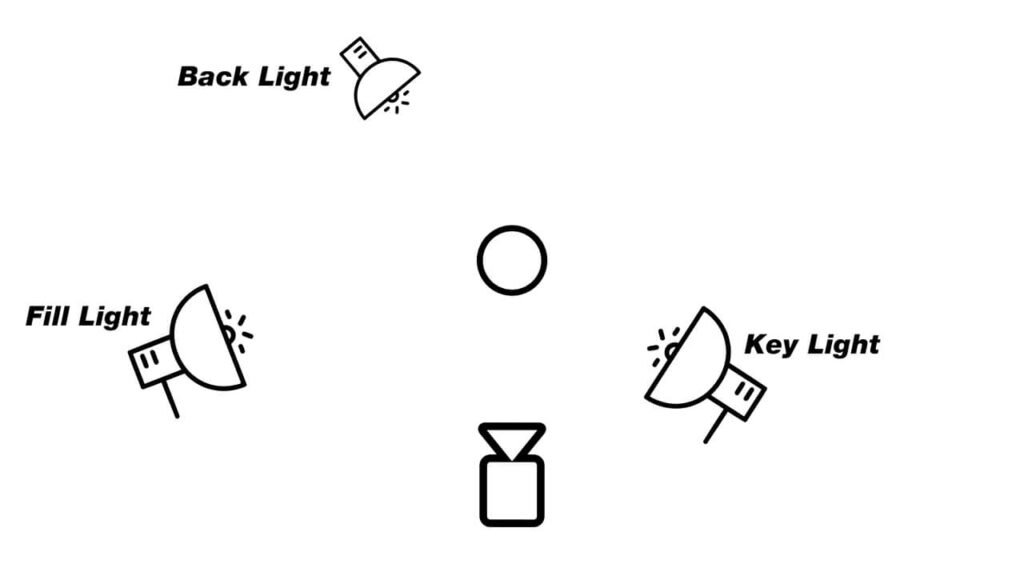
1. The Key Light (The Boss)
The Key Light is your main light source. If you were only allowed to use one light, this would be it.
- The Setup: In our demo, we placed the Key Light (Neewer NL660) on the right side of the subject’s face. It doesn’t matter if it’s on the left or right, as long as it is your core source.
- The Effect: With the back and fill lights turned off, the Key Light illuminates just one side of the face. This establishes the mood and exposure.
2. The Fill Light (Shadow Control)
The Fill Light sits on the opposite side of the Key Light. If I turn off the fill light, you can see the shadows are pretty dark on the other side of the face. When I turn it back on, it adds a nice fill, making the shadows less harsh.
Embrace the Shadows!
A lot of people think for YouTube videos, they need to flood the room with light to remove all shadows. That is wrong. Shadows are great because they shape your subject and create a 3D look. You just want to control them, not destroy them.
Hack: How to Dim Without a Dimmer
Your Fill Light needs to be dimmer than your Key Light. If you have a budget light that doesn’t have a dimmer knob, just move the light stand further back. Increasing the distance naturally lowers the intensity.
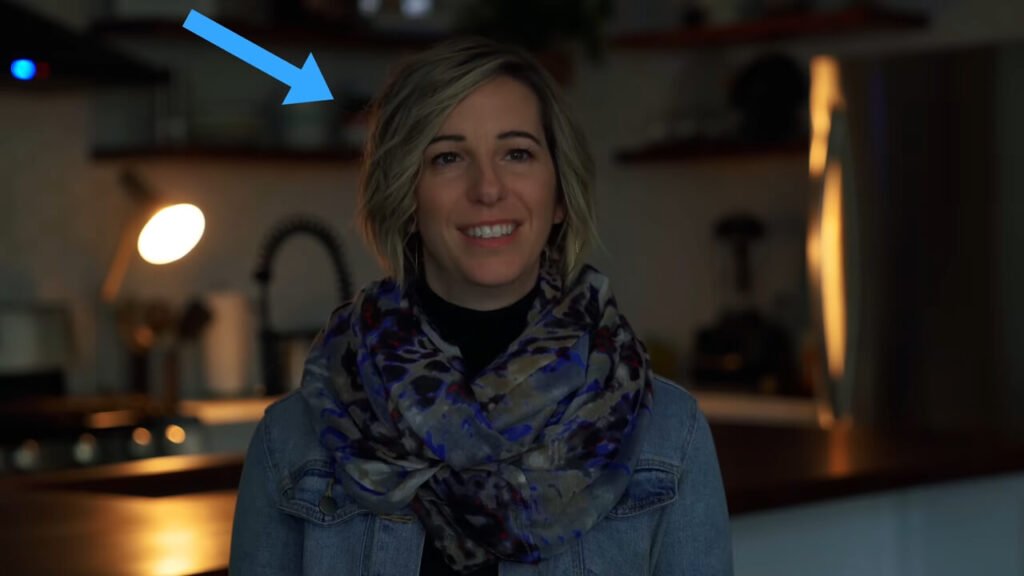
3. The Backlight (The Separator)
This is the third light in the setup. Its main purpose is to create separation between the subject and the background.
- Why you need it: Without this light, the subject often just “falls” and mixes into the background.
- The Result: Turning it on creates a nice rim of light on the shoulders and hair, making you “pop” out of the screen.
Part 2: The “Secret” Hollywood Hack (Motivated Lighting)
Now that you have your three lights set up, I’m going to share a secret technique used in movies that will take you to the next level.
It’s called Motivated Lighting.
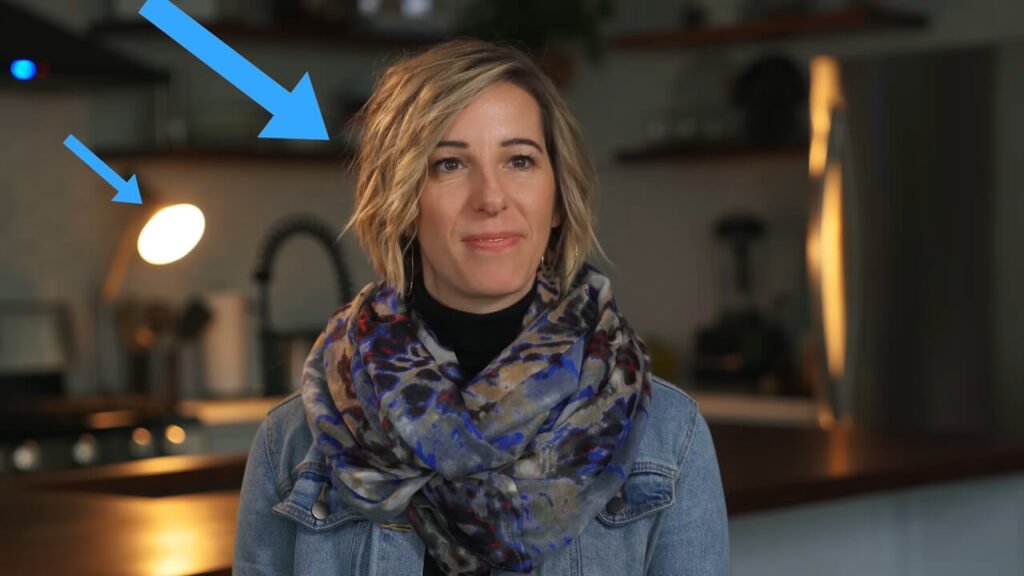
🔦 How to execute the “Lamp Trick”:
Sometimes, a bright rim light on your shoulder looks unnatural because the viewer doesn’t know where the light is coming from. To fix this:
- Place a Prop: Put a practical lamp in your background visible in the frame.
- Match the Light: Use a bi-color video light as your Backlight (like this $30 budget light).
- The Trick: Change the color temperature to warm orange to match the lamp.
Why it works: It tricks the viewer’s brain into thinking the light on your shoulders is coming from the lamp behind you. It looks incredibly organic and cinematic.
Part 3: 3 “Copy-Paste” Lighting Recipes
Now that you know the tools, here are three specific ways to arrange them for different types of videos.
Setup A: The “Rembrandt Remix” (Best for Talking Heads)
This is the standard setup we just discussed. It’s perfect for tech reviews, storytelling, and interviews.
- Key: 45 degrees, high up.
- Fill: 50% intensity on the opposite side.
- Backlight: Warm rim light (Motivated).
Setup B: The “Clamshell” (Best for Beauty)
Used by makeup artists to smooth out skin.
- Key: Directly in front of you, high up, pointing down.
- Fill: A reflector held in your lap, bouncing light up under your chin.
- Result: Zero shadows under the eyes or nose. Flawless skin.
Setup C: The “RGB Streamer” (Best for Gaming)
This is the trendy, high-contrast look.
- Key: Standard white light on your face.
- Backlight: Instead of white/warm, use an RGB Light (Blue/Purple) and blast it against the wall behind you.
- Result: This creates “Color Contrast” (Warm Skin vs. Cool Background), which instantly grabs attention on YouTube thumbnails.
Part 4: 5 Common Lighting Mistakes to Avoid
Even with the best gear, beginners often fall into these traps. Here is how to fix them.
❌️ Mistake 1: Placing the Key Light Too Low
The Issue: If your light is below your eye line, you will look like a villain in a horror movie (“Monster Lighting”). It creates unnatural shadows on your forehead.
The Fix: Always place the center of your softbox slightly above your eye level and tilt it down.
❌️Mistake 2: Mixing Color Temperatures
The Issue: Your Key light is Daylight (5600K), but your room’s ceiling light is Warm (3200K). Your camera will get confused, and your skin will look muddy.
The Fix: Turn off all house lights. Only use your controlled video lights.
❌️ Mistake 3: Reflections in Glasses
The Issue: A big softbox right in front of you reflects in your lenses, hiding your eyes.
The Fix: Move your Key Light further to the side (increase the angle to about 60 degrees) and raise it higher.

FAQ: Your Lighting Questions Answered
❓️ Can I use a ring light as a Key Light?
Yes, but be careful. Ring lights create very flat lighting. If you place it directly in front of you, you lose the beautiful shadows that define your face. I recommend moving the ring light to a 45-degree angle to create some dimension, just like a softbox.
❓️Do I really need a Softbox?
100% Yes. A “bare bulb” LED panel creates “hard light,” which emphasizes acne, wrinkles, and oily skin. A softbox diffuses the light, making it larger and softer. It is the cheapest way to make your skin look better without makeup.
Final Verdict
Lighting is 90% experimentation. Start with the “Motivated Lighting” setup I showed you—it’s the biggest upgrade you can make for under $50.
If you are looking for the exact gear to build these setups, check out my deep-dive reviews:
- The Heavy Hitter: GVM PRO SD300C Review (My go-to Key Light).
- The Budget King: Godox Lighting Buyer’s Guide.