I’m Lucas Gray. In my decade working on commercial sets, I’ve learned one universal truth: Lighting isn’t about making things bright; it’s about making them three-dimensional. The human eye is incredibly sophisticated, but a camera sensor is flat. 3-point studio lighting is the standardized “cheat code” used by filmmakers to trick the brain into seeing depth, texture, and emotion on a two-dimensional screen. Whether you are lighting a CEO for an interview or a product for a commercial, this setup is your starting line.
1. The Philosophy: Replicating the Sun
3-point studio lighting isn’t just a technical formula; it’s a recreation of the natural world. Think about the sun:
- The Sun itself is the Key.
- The sky and ground reflections are the Fill.
- The rim of light on a leaf or a mountain ridge is the Backlight.
By treating the human head as a sphere and the body as a cylinder, we use three distinct light sources to define the “360-degree” reality of our subject.
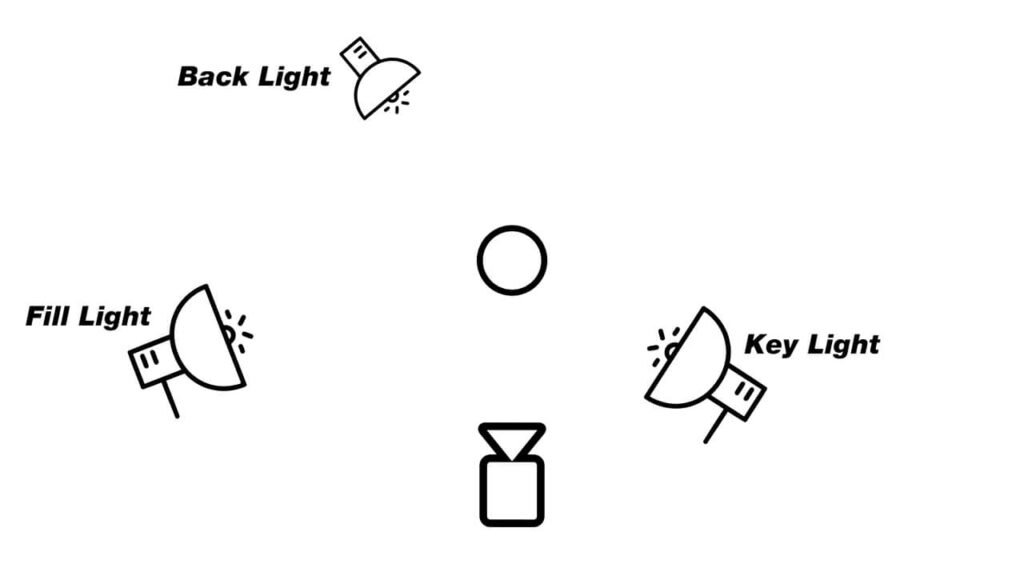
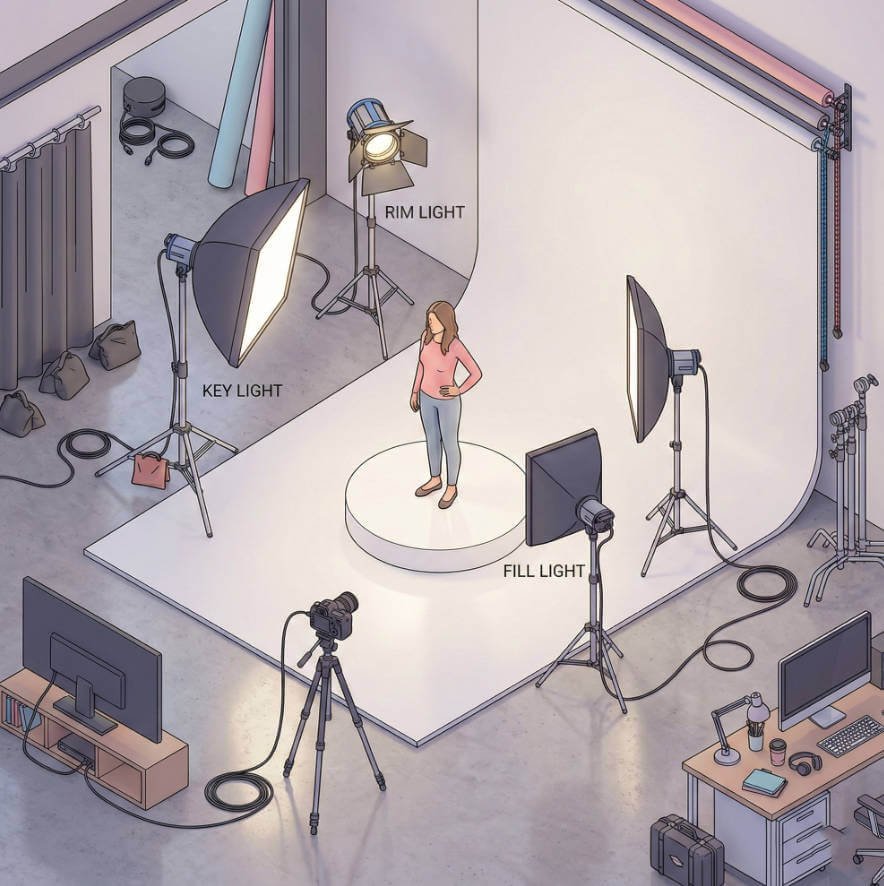
2. Breaking Down the Three Pillars
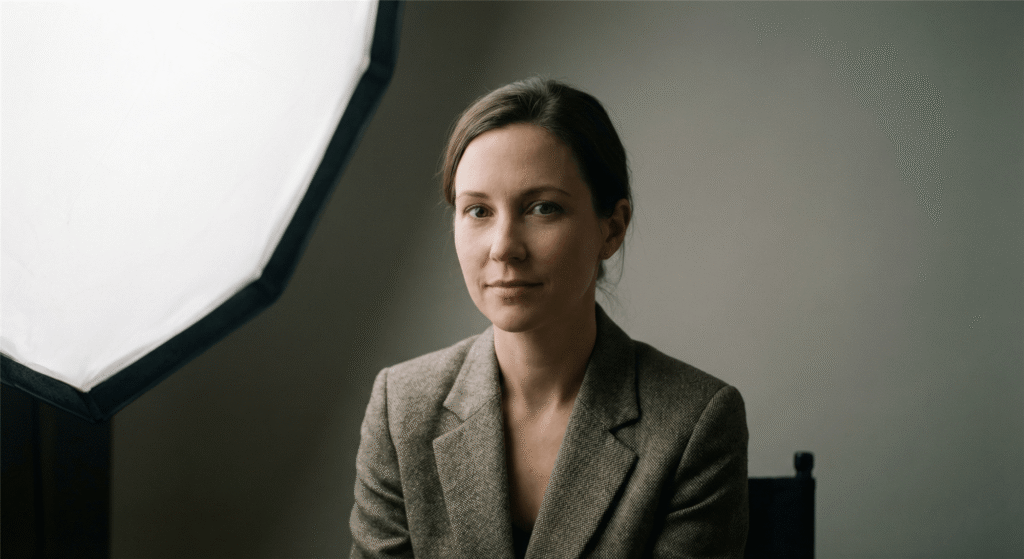
I. The Key Light (The Storyteller)
The Key Light is your primary source of illumination. It dictates the “mood” of the scene.
- Position: Ideally placed at a 15° to 45° angle both horizontally and vertically from the subject-to-camera axis.
- The Lucas Rule: Placing the Key Light at 0° (flat) makes a subject look younger but removes all character. Pulling it further to 45° adds drama and defines the jawline.
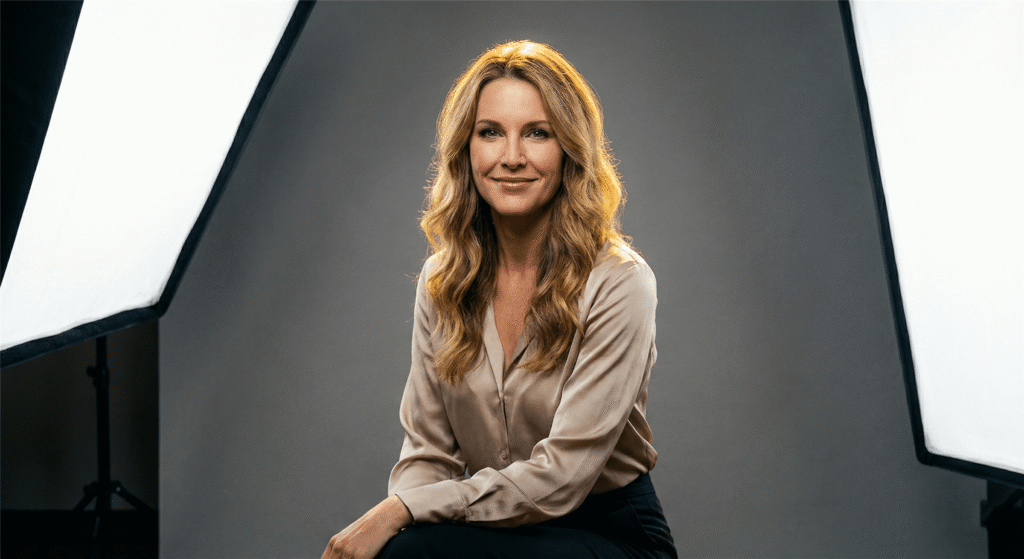
II. The Fill Light (The Detail)
The Fill Light sits on the opposite side of the camera. Its only job is to manage the shadows created by the Key.
- Character: This should almost always be a Soft Light. Using a large octabox or a silk helps fill in the dark side of the face without creating a second set of shadows.
- Intensity: It should be less bright than the Key to maintain a sense of dimension.
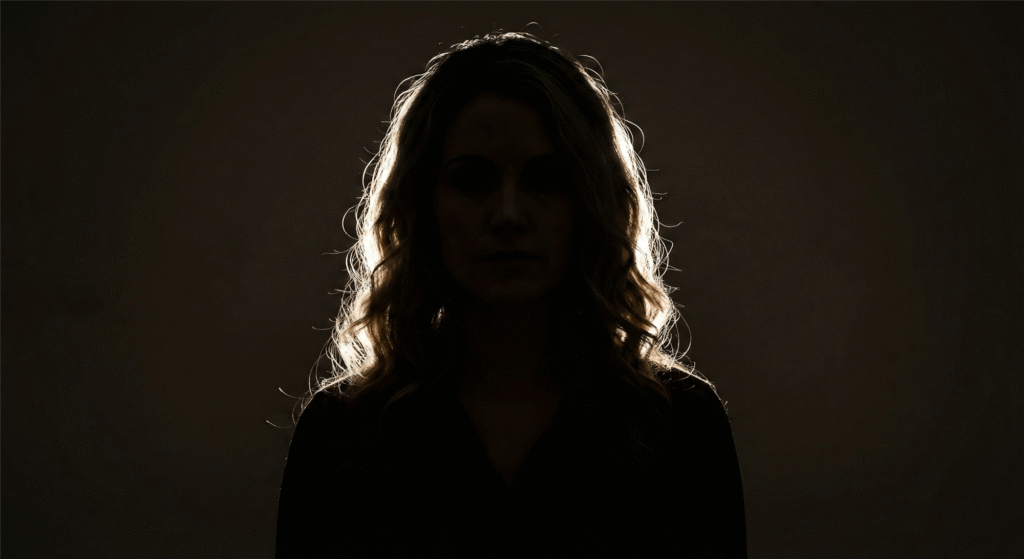
III. The Backlight (The Separation)
Also known as the Rim Light, this is what separates “pro” from “amateur.”
- Position: Placed behind the subject, usually at a high angle (50° to 60°).
- Function: It carves a thin, glowing outline around the hair and shoulders, separating the subject from the background. Without it, your subject will “disappear” into the set.
3. Mastering the Lighting Ratio
To achieve a “High Quality” status for your blog, you must understand Lighting Ratios. This is the mathematical relationship between your Key and Fill lights.
| Ratio | Visual Style | Best For… |
| 1:1 | High-Key / Shadowless | Beauty, Medical, Corporate |
| 2:1 | Natural / Soft Depth | YouTube Vlogs, Standard Interviews |
| 4:1 | Low-Key / Moody | Drama, Film Noir, Character Studies |
4. Modern Gear for 3-point studio lighting
In 2026, we’ve moved beyond hot, dangerous tungsten bulbs. For a modern, high-fidelity setup, I recommend a mix of COB (Chip-on-Board) and Panel lights:
- Key Source: The Nanlite Forza 150B (for portability) or the Aputure NOVA 9° (for precision).
- Fill Source: A soft LED panel like the GVM SD200B with a large diffuser.
- Backlight: A small tube light or a compact LED spot that can be easily hidden out of frame.
💡 Lucas’s Gaffer Insight: The Common Newbie Mistake
The biggest mistake I see in 3-point studio lighting is “Light Spill.” If your Backlight is hitting the tip of the subject’s nose, it’s too far forward. If your Fill light is creating its own shadow on the background, it’s too hard. Control your light using barn doors or honeycombs to keep each of the three points doing only its specific job.

Conclusion: Mastering the Blueprint
3-point studio lighting is a blueprint, not a set of handcuffs. Once you understand the 45-degree rule, you have the permission to break it. You are no longer just “turning on lights”—you are painting with photons.