In the modern era of digital content, visual storytelling is no longer just about resolution—it is about atmosphere. RGB studio lighting has emerged as the single most transformative tool for creators, allowing them to manipulate mood and depth with a smartphone app rather than a truckload of physical filters.
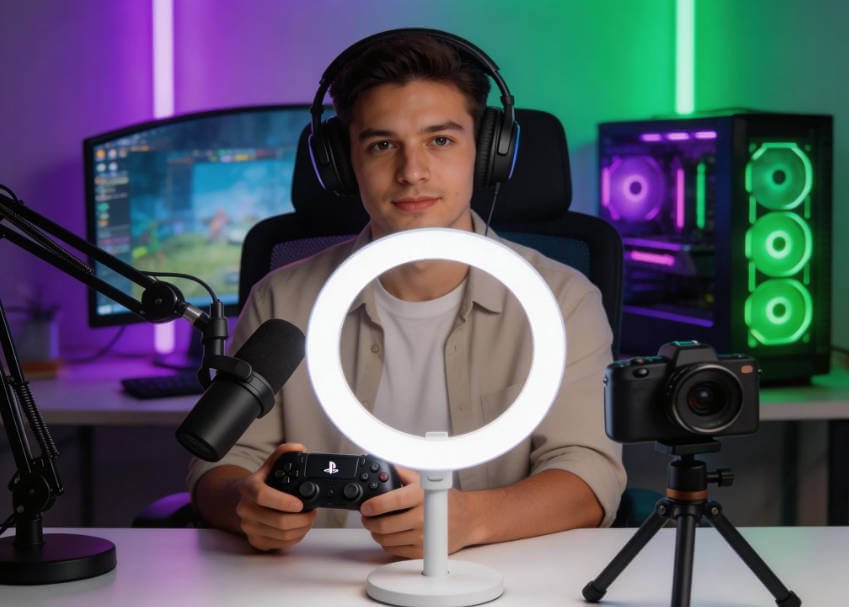
At StudioLights.org, founded by professional gaffer Lucas Gray (The Twilight Saga: Breaking Dawn – Part 2), we’ve witnessed the transition from rigid tungsten setups to the fluid world of full-color LEDs. As Lucas says, “In a world of 4K cameras, light is what actually creates the texture of your story.”
What is RGB Studio Lighting?
RGB studio lighting refers to LED fixtures that utilize Red, Green, and Blue diodes to create millions of possible colors. Unlike traditional “Bi-color” lights that only switch between warm yellow and cool white, RGB lights give you 360 degrees of color control (HSI mode).
The Evolution: RGB vs. RGBWW vs. RGBACL
To choose the right RGB studio lighting, you must understand the “chips” inside:
- RGB: The basic version. It often struggles to produce a “pure” white light.
- RGBWW: Adds dedicated White and Warm White chips. This is the industry standard for creators who need accurate skin tones alongside vibrant colors.
- RGBACL: The cutting edge (Red, Green, Blue, Amber, Cyan, Lime). By removing white chips and using six colors to blend light, these fixtures provide the most accurate color spectrum currently available.
Why Use RGB Lighting in Your Studio?
1. Psychological Storytelling
Color isn’t just “pretty”—it’s emotional. Using RGB studio lighting allows you to tap into color theory instantly:
- Blue: Suggests melancholy, technology, or moonlight.
- Red: Evokes passion, danger, or high-energy intensity.
- Teal & Orange: The “Hollywood Look”—using a warm key light on the face with a cool blue background to create maximum visual pop.
2. Efficiency and Speed
In the past, changing a light’s color required climbing a ladder to swap physical Color Gels. With modern RGB fixtures, you can change the entire look of your set in seconds via Bluetooth mesh networks (like Sidus Link or Nanlink).
3. Space Saving
One RGB light can replace an entire kit of gelled lights. This is vital for home studios and YouTubers working in cramped spaces.
Pro Techniques for RGB Studio Lighting
The Hybrid Setup: Natural Skin + Stylized Background
The biggest mistake beginners make is hitting their subject’s face with 100% saturated color. For a professional look:
- Key Light: Use a high-CRI white light (or an RGB light in CCT mode) to keep skin looking natural.
- Background/Fill: Use your RGB studio lighting to “wash” the background or provide a “rim light” (edge light) on the subject’s shoulder.
Simulating Specialized Environments
- The “Batcave” Effect: Use overhead RGB panels in a blackout studio to create a moody, automotive garage atmosphere.
- Rain Rooms: When RGB light hits falling water, the droplets act as prisms, creating a shimmering, cinematic effect.
- TV Glow: Use a “flicker” effect on your RGB light with a cool blue hue to simulate someone watching television.
Recommended RGB Studio Lighting Gear
| Tier | Recommended Gear | Best For |
| Budget | GVM 800D / Nanlite PavoTube II 6C | YouTubers & Hobbyists |
| Mid-Range | Aputure 300c / Nanlite Forza 60C | Indie Filmmakers & Professional Content Creators |
| High-End | ARRI SkyPanel / Quasar Science RR | Commercial Productions & Car Studios |
FAQ: Everything You Need to Know About RGB Studio Lighting
Q1: Does RGB studio lighting affect image quality or sharpness?
A: If you use low-quality, cheap RGB lights, you may encounter “flicker” in your video or “banding.” High-quality RGB studio lighting with high CRI (95+) and TLCI (96+) scores ensures that colors are rendered accurately and remain flicker-free even at high frame rates.
Q2: Why does the brightness drop when I switch from White to a Color?
A: This is a common characteristic of RGB lights. When a light is in “White” mode, all the diodes (including the dedicated white ones) are working. In “Red” mode, only the red diodes are on. Expect a 30%–50% drop in total output when using highly saturated colors.
Q3: What camera settings should I use for RGB lighting?
A: Since RGB LED lights are continuous (not flashes), you should:
- Increase your ISO (800–1600) to compensate for lower intensity.
- Use a tripod if your shutter speed drops below 1/50 for photography.
- Set your White Balance to match your Key Light (usually 5600K) so the colors are rendered correctly relative to “white.”
Q4: Should I buy RGB lights or just use color gels on my existing lights?
A: Use Color Gels if you are a photographer using high-power strobes (flashes), as they provide more power. Use RGB studio lighting if you do video, as the ability to see the color in real-time and use built-in effects (lightning, fire, police) is an massive advantage.
Q5: Can I use RGB lighting for “Green Screen” work?
A: Yes! In fact, setting your background RGB light to a pure “Green” hue can help saturate your green screen, making the “keying” process in post-production much cleaner.
Final Thoughts: Light is Your Paintbrush
RGB studio lighting has democratized the “Hollywood look.” What once required an expensive lighting crew is now achievable for anyone with a creative vision. Whether you are lighting a sports bike in a neon tunnel or a simple talking-head video, remember that the color of your light is the color of your brand’s emotion.
Ready to transform your studio? Explore our latest reviews of the best RGB studio lighting on the market and take your production value to the next level at StudioLights.org.